


The Payout Tab allows you to easily monitor all payouts through your dashboard. It’s a great way to stay on top of your finances and know exactly which spaces and pages have been paid out. You’ll also see the balance for "Available to Payout" and "Available to Payout Soon".
Navigate to your Payout Tab to see the status of your payouts. View the amounts available to payout right now, and check which funds are coming up soon for payout, and which spaces and pages were paid out!
Only Organization Owners and Admins have the ability to request check payouts. Follow these steps to request a check payout:
It’s simple, fast, and easy to manage!
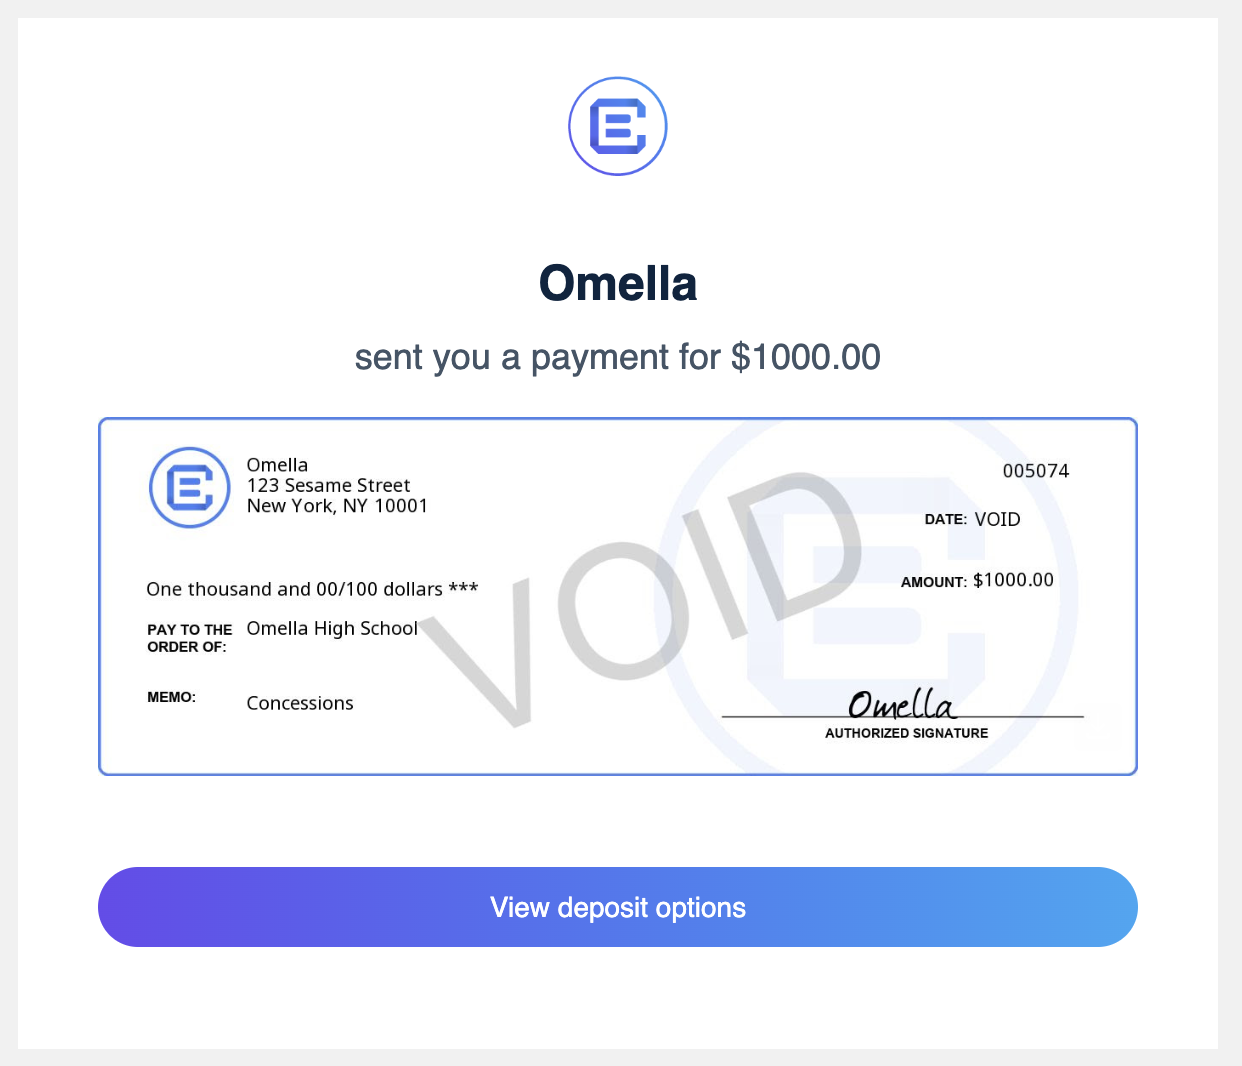
The check takes approximately 3-5 business days to be issued and delivered to your email. Once received, click "View deposit options":
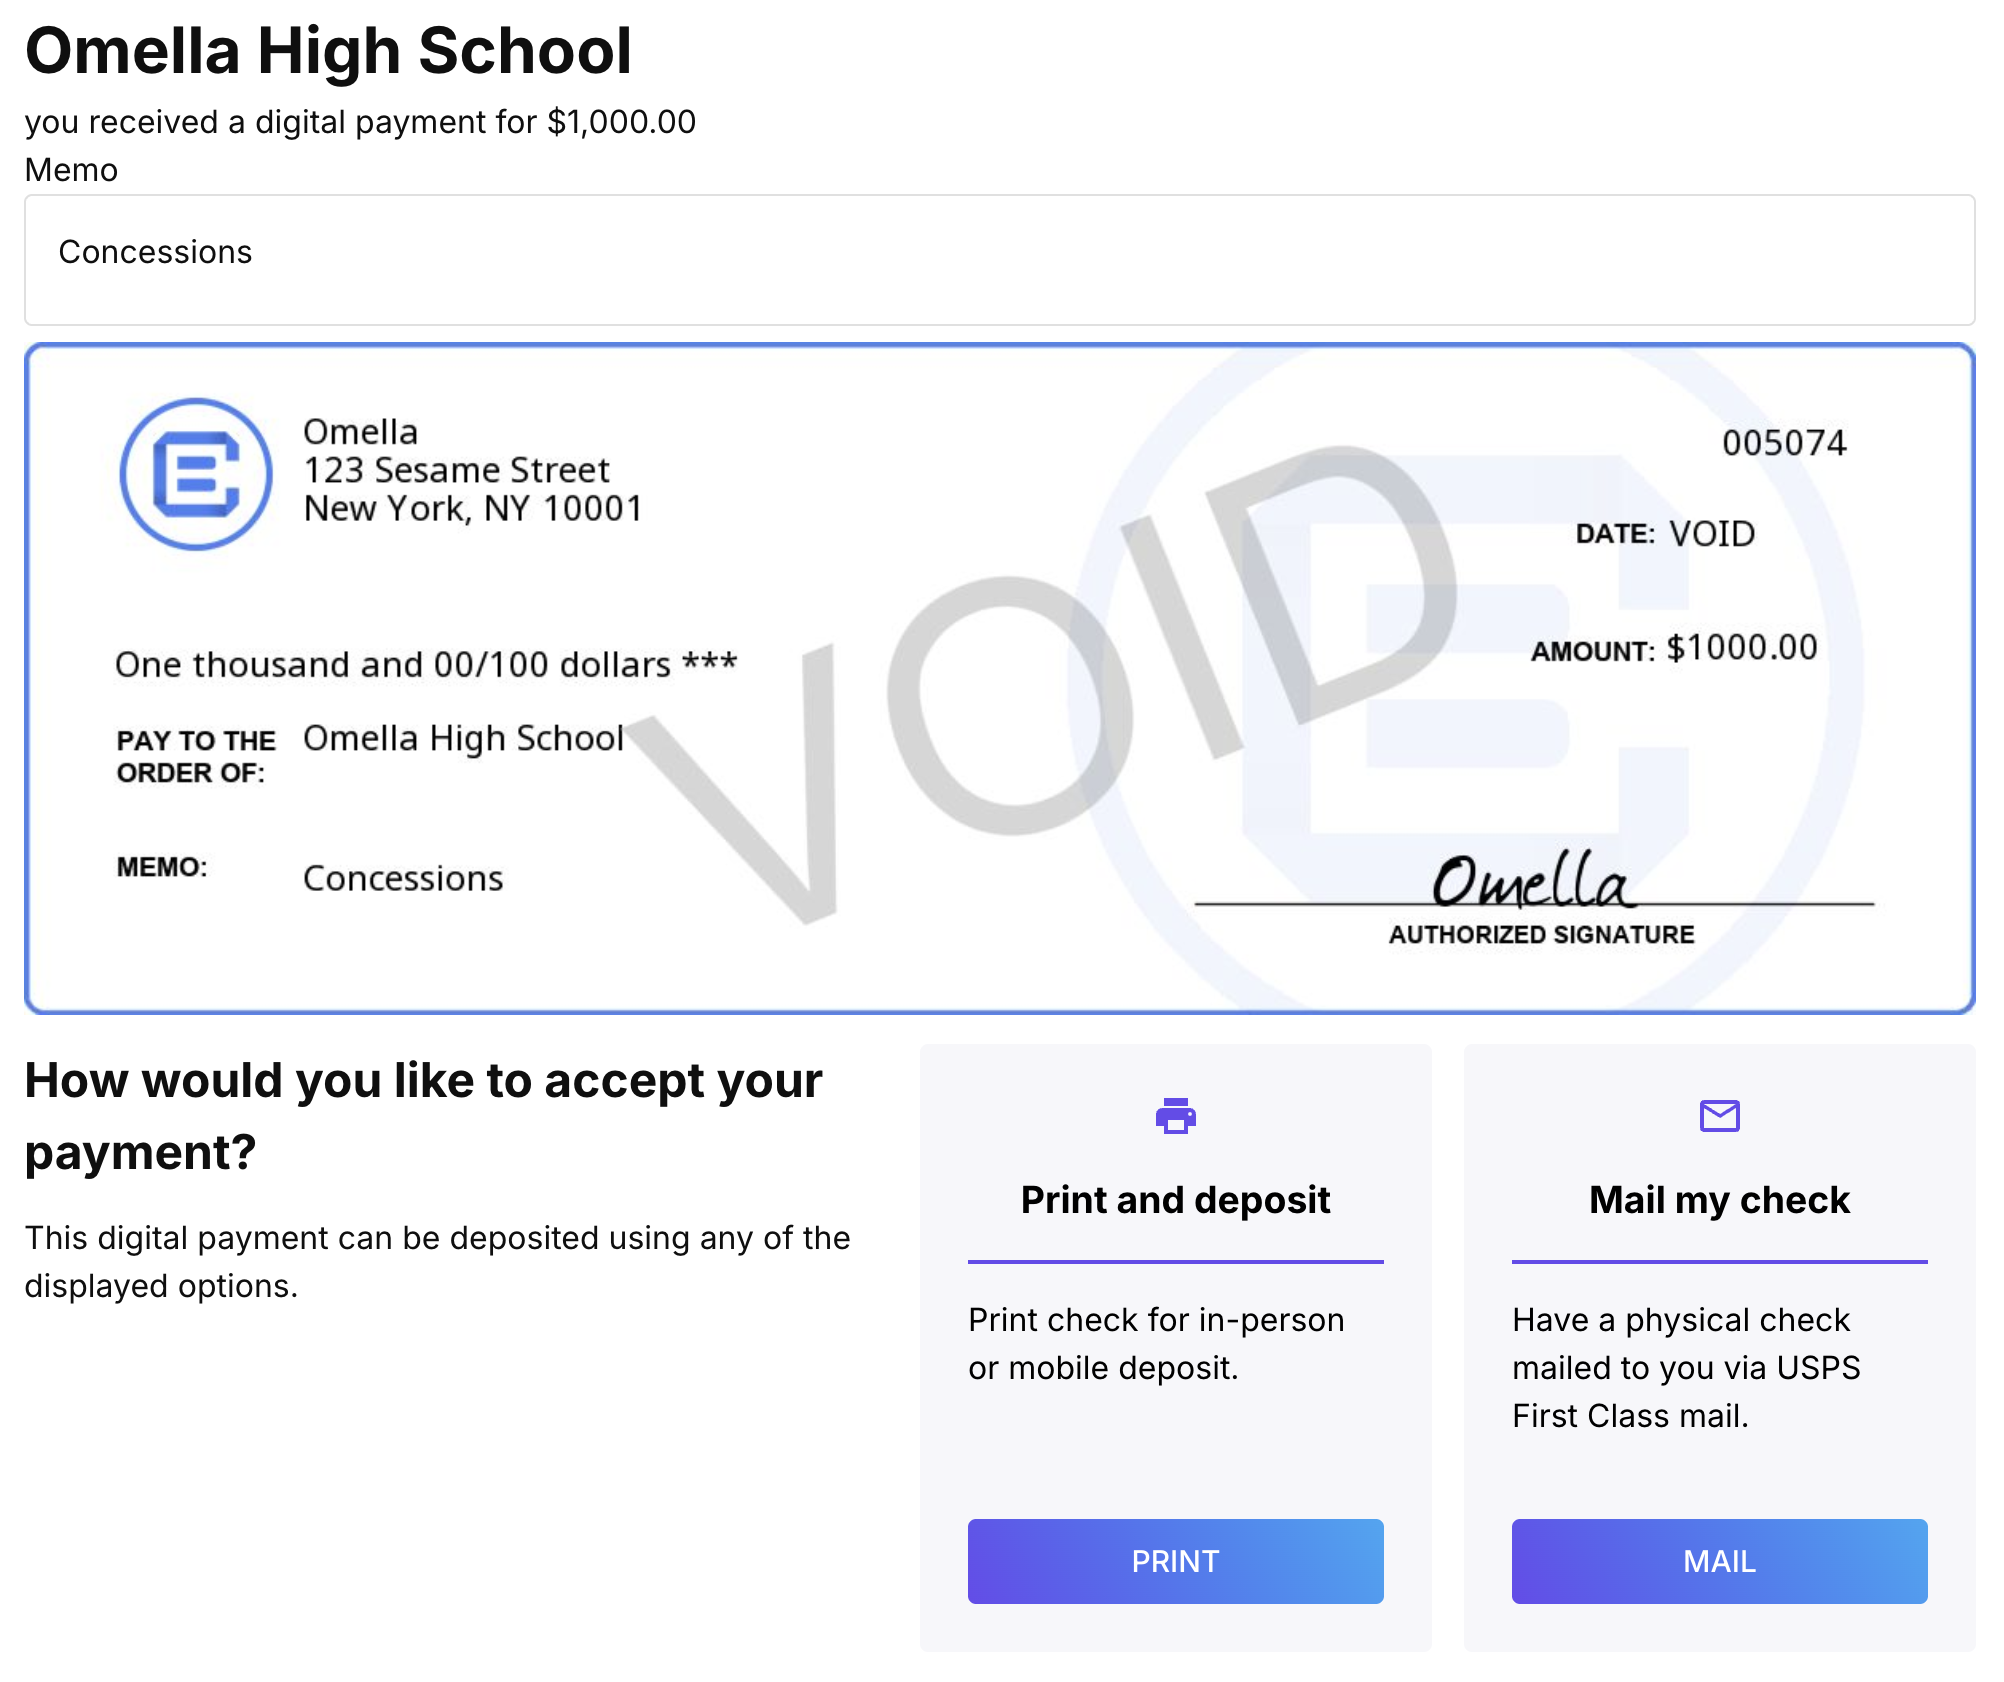
Then you'll get to choose whether to print or mail the check.
⚠️ IMPORTANT: If you need a physical check, make sure to select 'Mail my check' — do not click "Print". Please be aware that it may take up to 30 days to receive the physical check via USPS.


The rich text element allows you to create and format headings, paragraphs, blockquotes, images, and video all in one place instead of having to add and format them individually. Just double-click and easily create content.
A rich text element can be used with static or dynamic content. For static content, just drop it into any page and begin editing. For dynamic content, add a rich text field to any collection and then connect a rich text element to that field in the settings panel. Voila!
Headings, paragraphs, blockquotes, figures, images, and figure captions can all be styled after a class is added to the rich text element using the "When inside of" nested selector system.